The Pillow Loom is a simple, portable, and inexpensive to make tool that can
be used for weaving, as a book prop, and as a writting and craft surface. It
is intended for use in school, homes, rehabilitation settings and the like.
Many of the ideas presented here can be adapted for use with ready made frame
looms.
This web page is a work in progress and has just been begun. Please check the
links to Extended Documentation for useful books, instructions, and resources.
Check back for updates as more information is added. You'll notice some duplication
of information between the page below and text in the Extended Documentation.
A lot of that duplication will be deleted when time allows.
 |
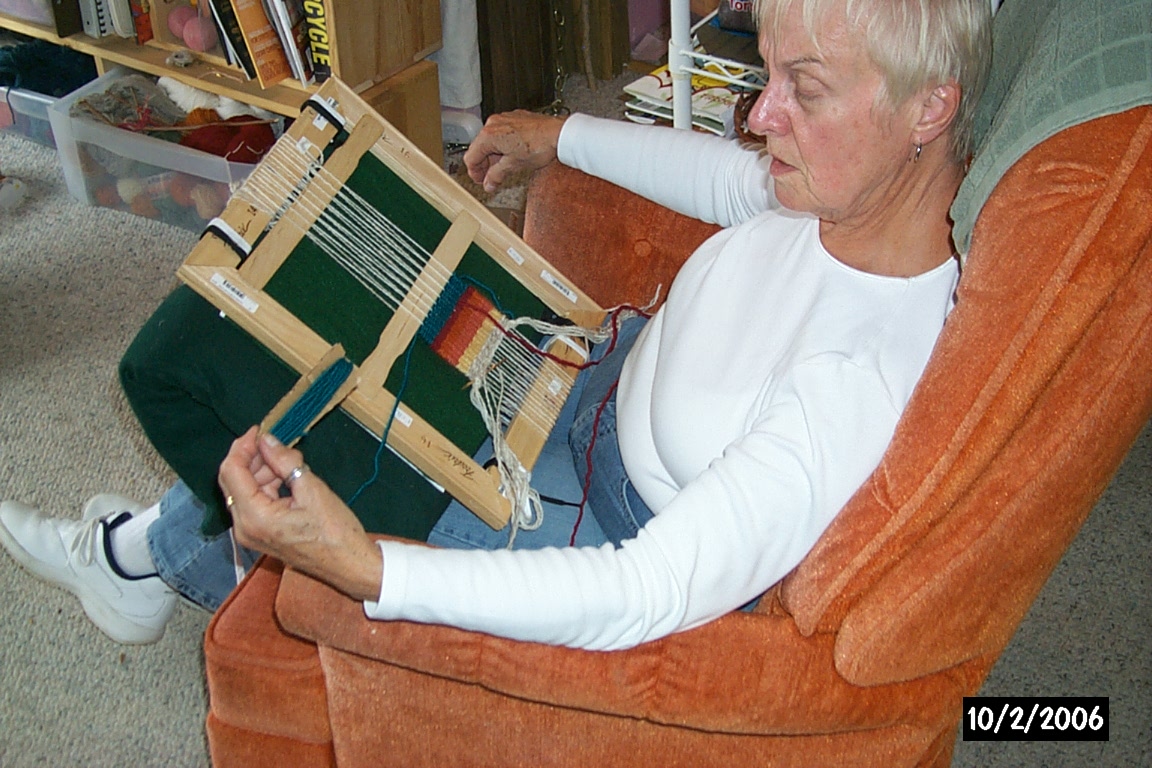
TheLoom can be used while sitting, in bed, on the floor, or
on a table. Between the back of the frame and the pillow is a white Artist's
Canvas Panel to keep the pillow from pushing into the weaving. It also gives
a plain visual back drop to the weaving. Here the Panel is coverd by a green
cloth for color contrast with the light warp (up and down) yarns. People
with any kind of brain damage or vision problem may have dificulties distiguishing
the yarn strands from the background of pants, living room etc.. A common
vision problem is loss of "depth of field". That is when, for
example, a person cannot "see" a white towel on a white bedspread;
it "disappears".Play with colored paper, cloth or the white background
for your friend's needs depending on yarn colors used. |
 |
The Loom is tied around a bed pillow using two 54" shoestrings which
have been cut in half. The angle of the pillow can be adjusted by tightening
or loosening the shoestrings then pushing or pulling the pillow into the
desired shape. The front edge of the pillow can be pulled under the frame
to give more soft, support, surface on the tops of the weaver's legs.
This is useful for those who are bedridden and may have fragile skin.
Be safe: use good judgement please..
|
 |
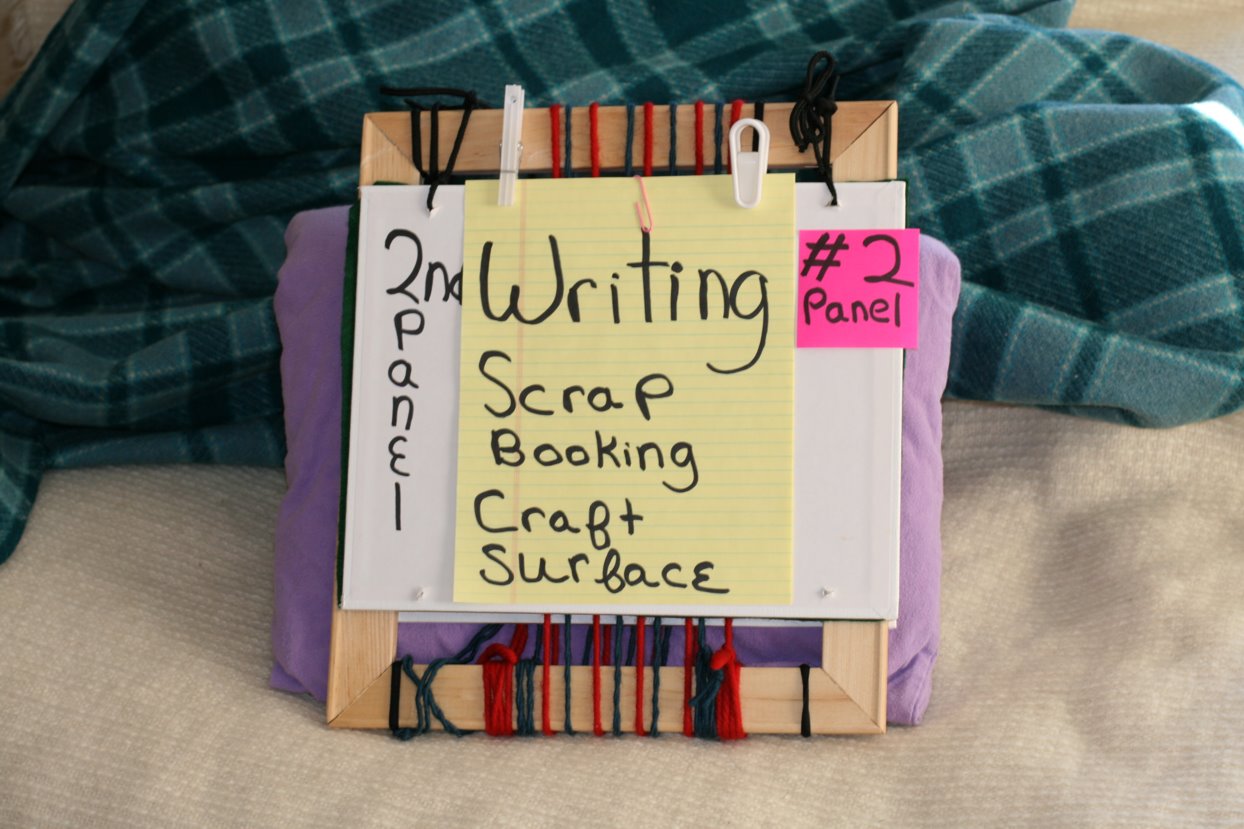
In this side view first notice the white Canvas Panel between
the frame and the pillow. Then, notice the second panel which is tied to
the top of the frame with strings that are threaded through holes is the
panel. This second panel, which is used as a writtng surface has been flipped
back out of the way of the loom being used for weaving, or if it was in
use as a book prop. Use the smooth side of the panel, with product name
on it, for a writting surface. |
 |
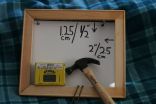
Second panel in place with paper clipped on the front and
the first panel inserted between the frame and the pillow. Note: An 11"/28
cm X 14"/36 cm panel leaves a little space, top and bottom, between
the edge of the panel and the inside tops and bottoms of the frame. This
gives space for tieing and untieing the Canvas Panels. |
 |
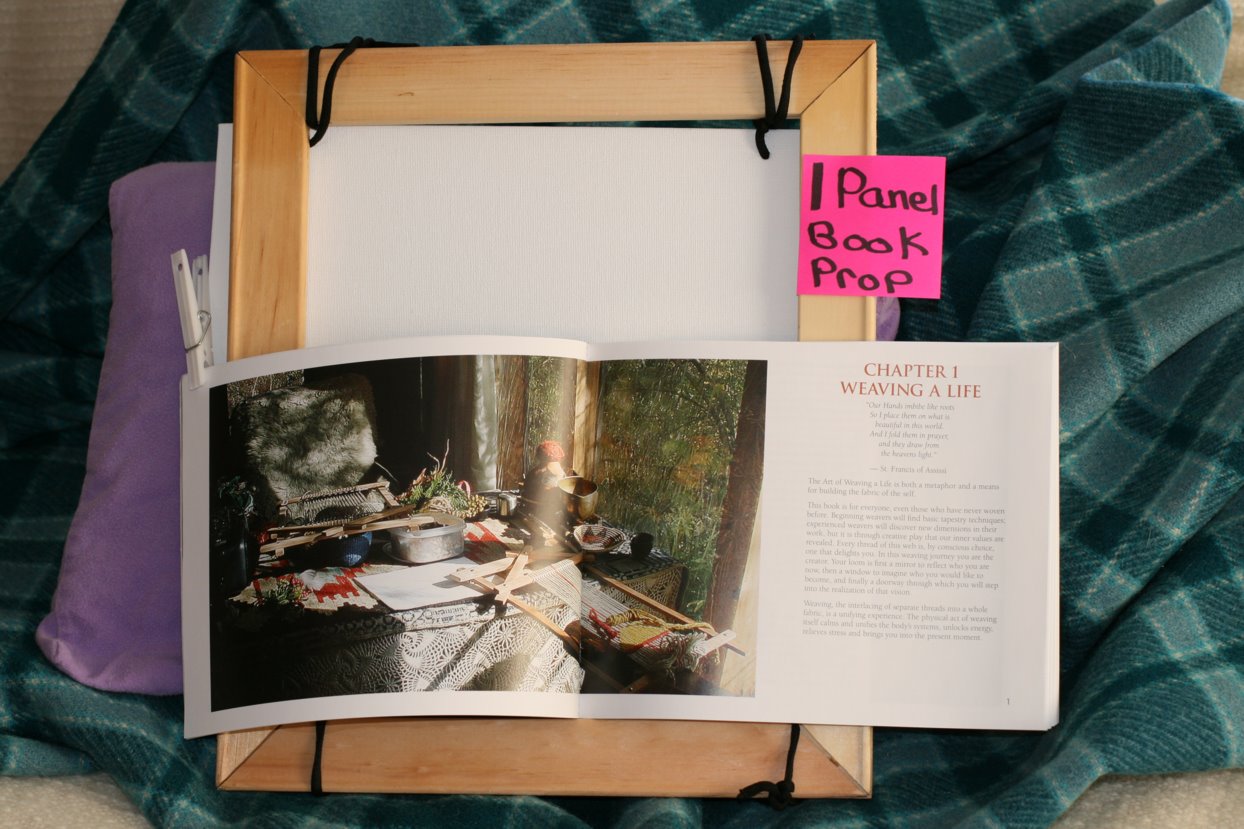
Loom used as a book prop with one Canvas Panel, tied behind
the frame. This both keeps the pillow from poking through the frame opening
and gives a back rest to the book. The book pictured is "ZATI: The
Art of Weaving a Life" and is used with the permission of the author.
|
 |
The frame can be made with, pre-notched "Stretcher Strips"
which are available from art supply stores for under $6 for all four pieces.(2007
prices/ See Supply section) Wearing gloves, squeeze a little white glue
into one joint at a time, push the ends together until all four corners
are joined, tap into place, check all corners to see that they are lined
up, use a damp cloth to wipe away excess glue, let dry 24 hours, then sand
off any splinters and rough spots. |
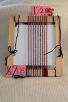 |
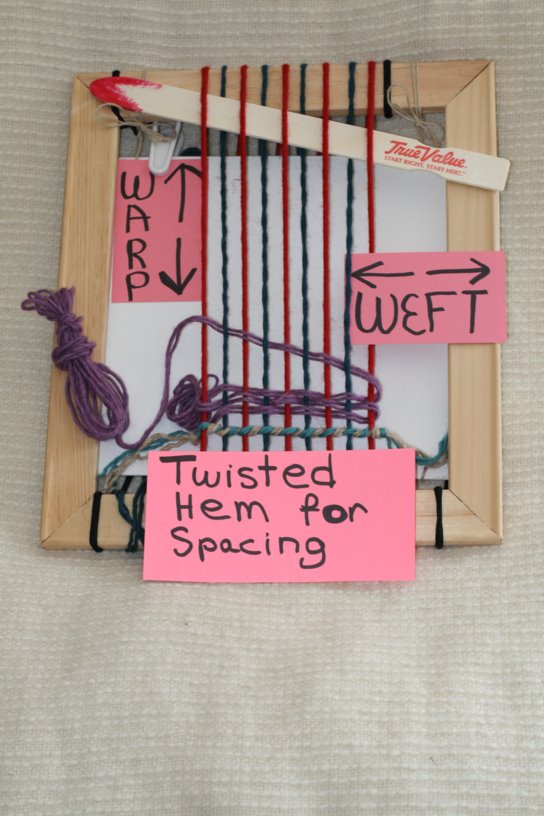
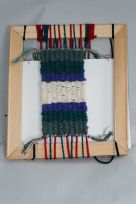
Since this project is mainly for begineers, and those with
stiff fingers, I'm using 1/2" spacing between the lengthwise yarns.
I'm also using fat yarns or med-heavy wt. yarns tripled or dbld. for both
warp and weft (cross wise strands). We use two colors of warp to help make
"odd & even" & "over & under" easy to distinguish..
Start Color #1 at bottom right. Make several wraps at bottom frame. (This
extra allows for equal length fringe if , when piece is done, you cut warp
in middle of the back of the piece) Now loop warp yarn up, over top of frame,
down the back side, and continue for 5 big loops SPACED 1" APART, ending
at the bottom, and adding the extra bottom wraps. .Color #2 ,start inside
color #1, 4 wraps, between each line of the first color, spaced 1/2"
apart,ending inside #1. Since color #1 is an odd # you'll have the same
color yarn on each side of your piece. Make sure you have the same # of
warp strands front and back. To start weaving, rotate the frame so that
the extra, future fringe,wraps are out of the way at the top. The two color
idea was given to me by a group that has a weaving program for those with
disabilities. Thanks! Note: If you have flexable fingers, try your 2nd piece
at 1/4" spacing with thinner yarns. |
 |
This shows how to mark your holes in the Canvas Panels so
that you can tie the panels onto the frame. The back panel doesn't need
tieing if you slip it between the frame and the back warp; the pressure
of the pillow holds it in place. You do need to tie on the front panel/writting
surface on top. You'll likely want 4 holes and ties for a back panel used
without a pillow proped against a rock. A 16d/16 penny nail makes a perfect
hole for fat shoestrings. |
| |
54" fat polyester shoestrings can be purchased for about
a $1. Cut in half.
Tie the cut ends around the tops and bottoms of your frame and the narrow
ends tie around your pillow. Shoelaces are better than string because they
are designed to tie, hold, then untie easily. |
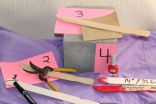 |
Paint stirring paddles are fine to use as "battens". Use them
to lift alternate colors of warp, then turn the batten on it's side to
create a gap (a shed) between the two colors of warp. Then you pass your
weft (cross wise yarn) through that opening. Paddle wood splits easily,
so start at the corner edge of the stick and make small cuts from the
body towards the end, diagonal, cuts, until you reach a good angle. (See
#1 in photo). Rub splinters and rough edges on a cement block, sand (#3),
paint the cut and front edges with nail polish, dry 24 hours, and finish
sand. 14" sticks are easier to use than 12". Paint stores give
them for free, but I like to offer to pay.
|
 |
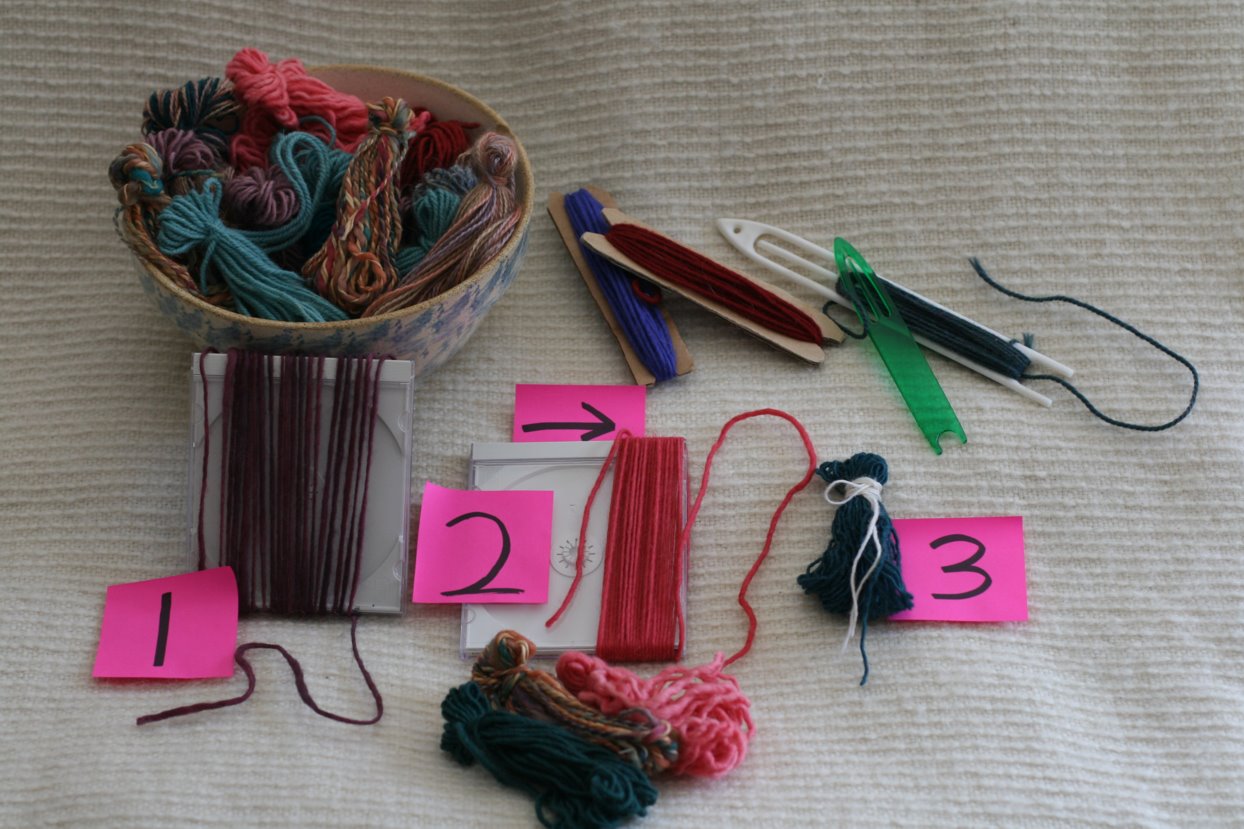
Making yarn bundles for weft: Take your fat or dbld or tripled
yarn and wrap it around a CD case or book. Use your fingertips to push/pull
the yarn to the edge; try to keep the loops in alignment. Grasp and pinch,the
top of the loop. Use the end of the yarn form the right edge of the CD to
wrap around the neck,then tuck it in the neck.Note: I've used white yarn
around the neck of the bundle next to #3 as a visual aid. You can also make,
notched, cardboard shuttles ( good for those with stiff fingers), or use
fishing net mending shuttles. |
 |
View of a batten in use; it can also be used to push/pack
down the woven weft ( or use your fingers or a fork). Note: I'm using strong
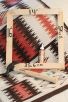
colors here so that you can see what's going on. For some people, such as
those with Austism, bright colors may be too stimulating, as could some
textures. (Please check with a "pro" in that field with any such
questions.) The "twisted hem" is used, bottom and top, as a way
to hold the warp spacing in place, and as a nice finishing touch against
which you can tie off your warp ends, once cut. Measure two pairs of yarn,
extra wide, overhand knot leaving a tail, twist over each other, usually
twice, to fill the space between warp strands, continue to right end, overhand
knot leaving a tail ( say 3-4"s) and cut. |
 |
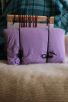
Optional use. When done with weaving one side, remove frame
from pillow, flip over, reattach, move Canvas Panel to the back of the loom
behind the first weaving thus allowing the fist piece to be a pattern for
a matching weaving to be done on what was the back warp. The back warp will
be at an angle so just straighten it. Alternatively, you could place the
white panel so as to hide the first weaving and do a completely different
piece using the, old, back warp. You'll just have, fairly, short fringe
for both pieces. Or, you can make two shorter weavings and have longer fringe. |
I hope you find "The Pillow Loom" a happy addition to your life and
work.